2.6. Shoebox Model and Basic Visualizations#
2.6.1. Opening your shoebox model#
Download the single family home Rhino model from Github: here
Open your single_family.3dm model.
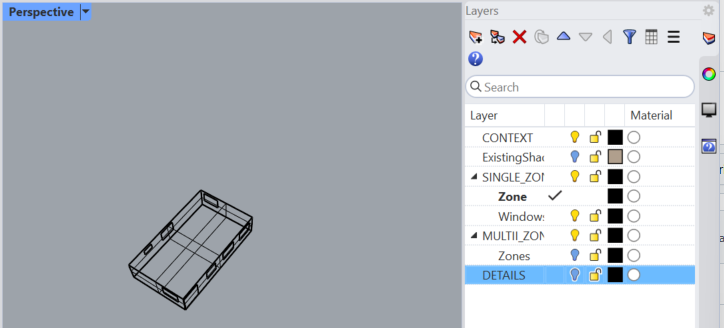
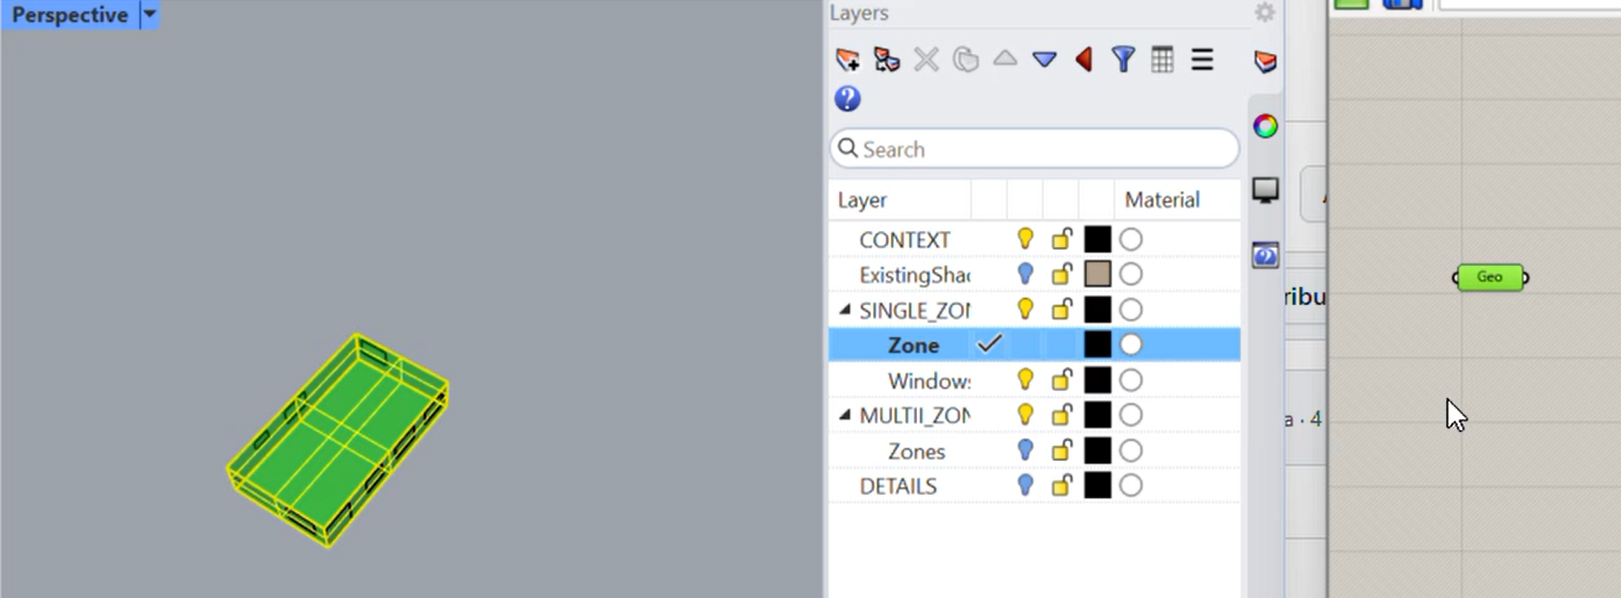
Hide the three layers as shown below. Your home should now appear as a simplified box. When we learn to analyze a building, we start with the simplest form first.
2.6.2. Create a “Geometry” component#
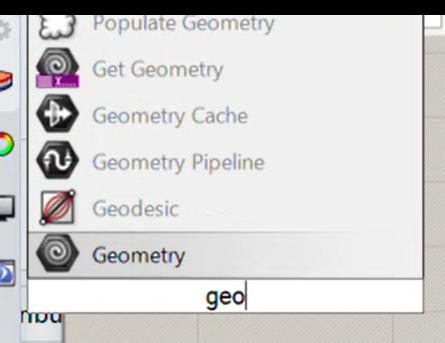
Double-click the canvas, type in “Geometry”, click to select the component, and click again on the canvas to place the component.
2.6.3. Select objects#
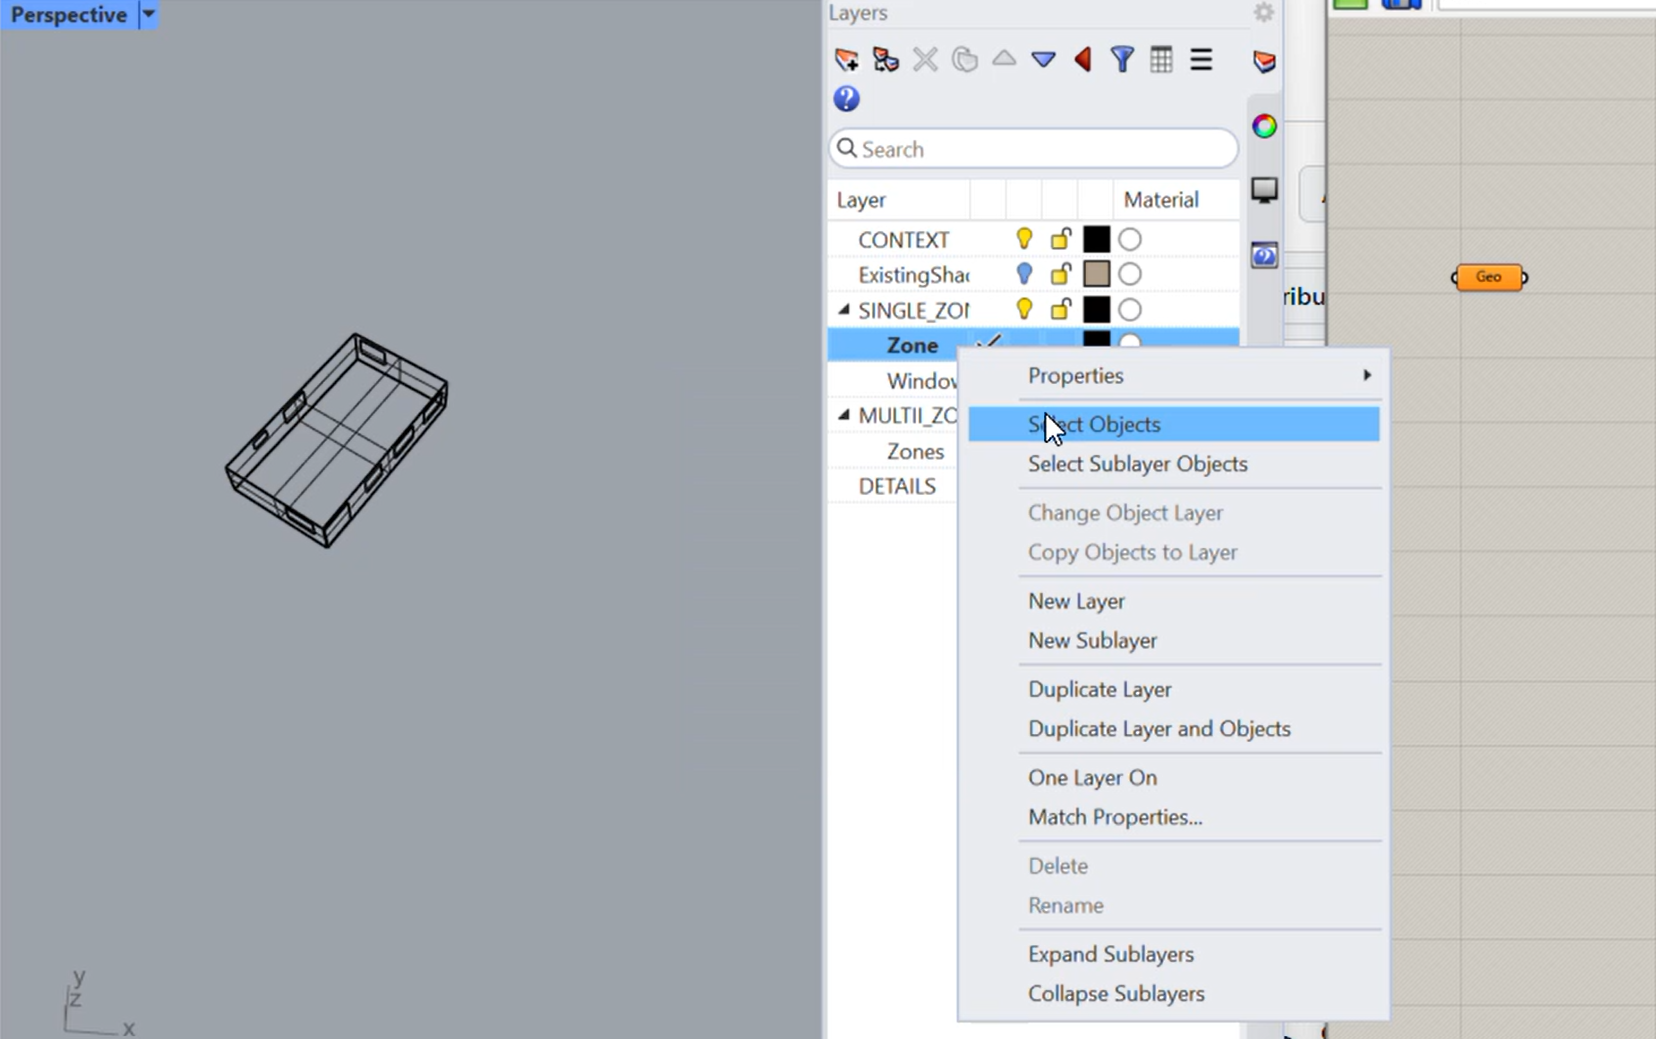
Locate the “Zones” sub-layer within the SINGLE_ZONE layer. Right click it and click “Select Objects”
2.7. Set one geometry#
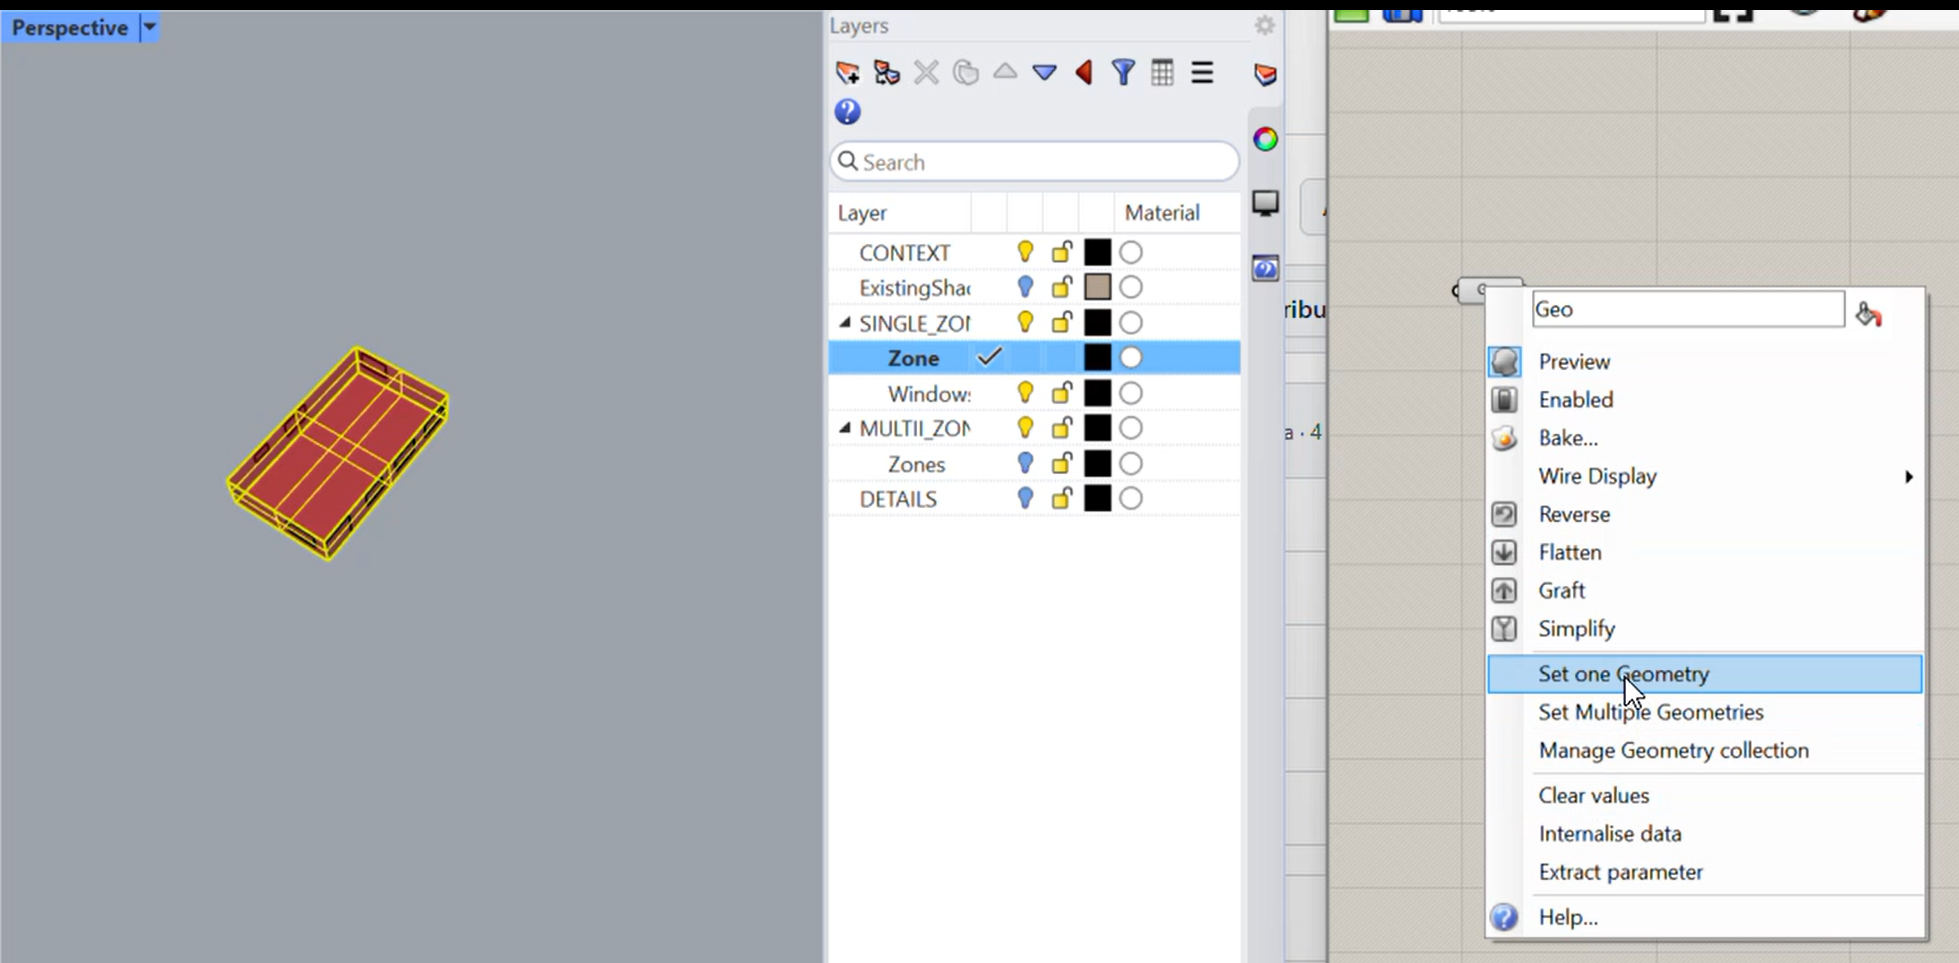
Right click your geometry component and select “Set one Geometry”.
2.7.1. Check if geometry is set#
If your geometry is set properly, clicking your geometry component will highlight your zone in green in Rhino. Clicking elsewhere in the canvas will highlight the zone in red.
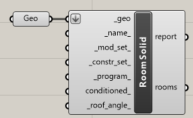
2.7.2. Create “Rooms Solid” Component#
Create a “HB Room From Solid” component similarly to how you searched an placed the “Geometry” component earlier. Connect your Geometry to the _geo input.
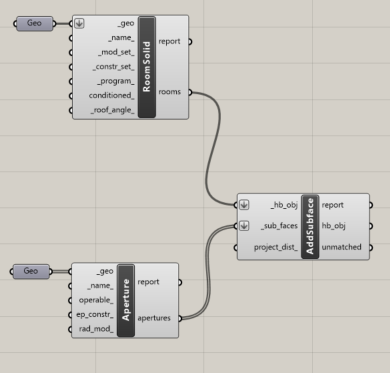
2.7.3. Set Windows and link to Aperture#
Select the objects in your Window layer and ‘Set Multiple Geometries’ in a new geometry component. Connect it to an “HB Aperture” component.

2.7.4. Add Subface#
Create the “HB Add Subface” component. Connect rooms -> hb_obj and apertures -> ‘_sub_faces’ as shown.
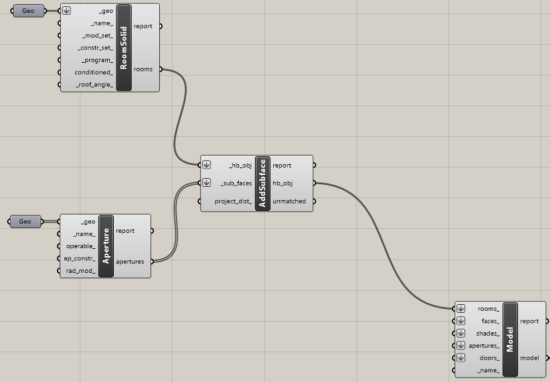
2.7.5. Create Model#
Create the “HB Model” component, then connect hb_obj -> rooms_ as shown.
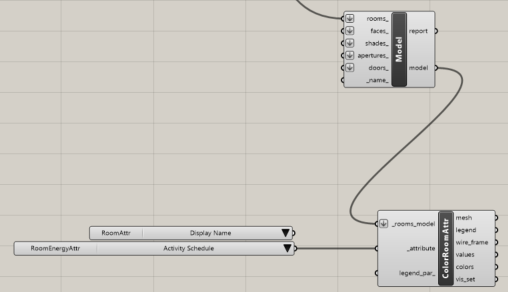
2.7.6. Visualize Room Attributes#
Continue to recreate the block diagram step-by-step by searching for components (HB Room Energy Attributes, HB Room Attributes, HB Color Room Attributes), placing, and connecting them.
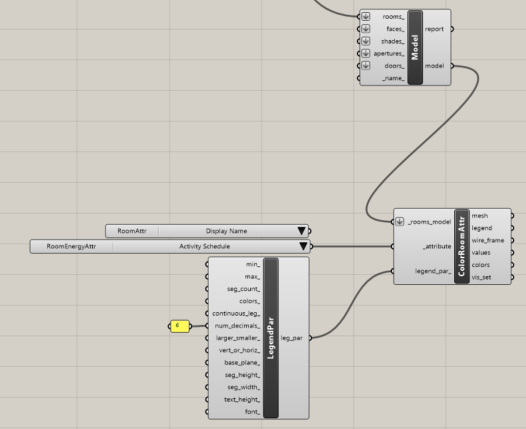
2.7.7. Specify HB Legend Parameters (LegendPar) component#
The yellow box is a “Panel” component. This component can be double clicked and typed into. Alternatively, as a shortcut, double click the canvas, type ” then 6 and press enter. This should create the same panel as shown in the image.
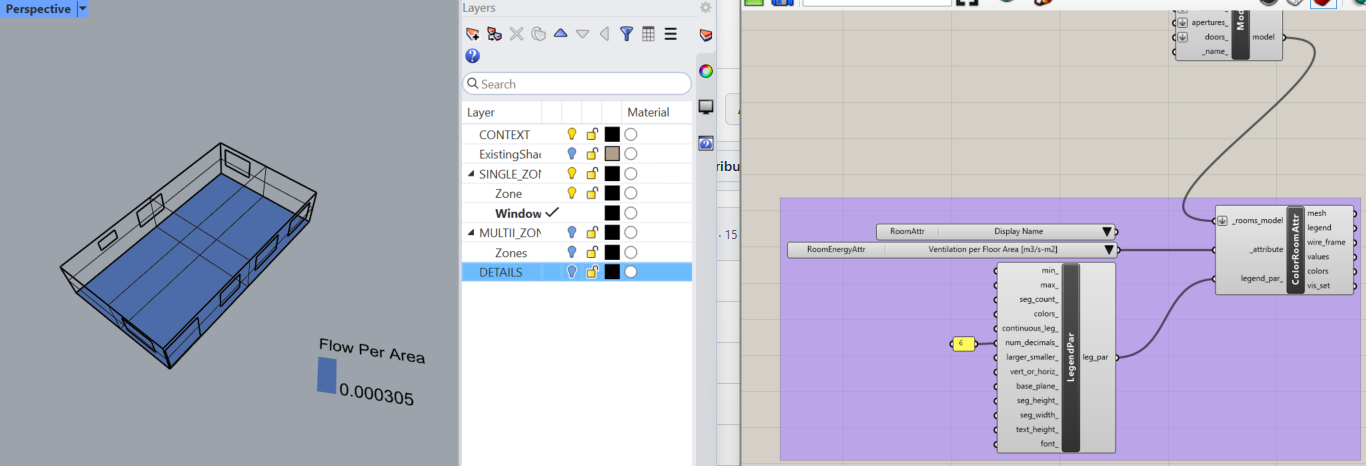
2.7.8. Check Room Attributes and Group Block#
Selected components can be grouped into a purple box with CTRL+G. To select compontents, hold SHIFT and click them. Alternatively, hold left-click and drag the generated rectangular box around the components your want to select.
The ColorRoomAttributes component we created should color the floor of your shoebox model and generate a legend indicating the selected attribute and associated value. Click through several attributes in your dropdown menu component in Grasshopper and watch the generated visual change in Rhino .
2.7.9. Check Face Attributes#
Hide the Room Attribute visualization by right clicking the component and selecting “Hide Preview”. The “HB Color Face Attributes” component visually shows useful characteristics such as the material type. It can also visualize thermal resistance (called R-values) and thermal conductance (called U values or G values). Read more here: https://en.wikipedia.org/wiki/Thermal_conductance_and_resistance